Monday, May 13, 2013

ArcPad Data Collection

Introduction
Throughout my college career, I have used various GPS devices for navigation and data collection.  However, I had previously never created a geodatabase to be deployed in the field to be used for data collection.  This report will summarize the process of developing a data collection procedure from the ground up.  This process begins with creating a geodatabase and feature classes.  Domains will be set for the feature classes to aid in the data collection process in the field.  Finally, the geodatabase will be saved to a Trimble Juno GPS unit for data collection.
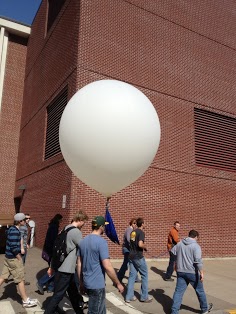
Figure 1. Trimble Juno to be used to collect GPS data
Study Area
This weeks assignment consisting of ArcPad data collection took place at the Priory.  This land, purchased by the university to be a day care facility, is located to the south of the city of Eau Claire. Figure 2 shows the mostly wooded areas surrounding the building that we have previously used for navigation exercises. 
Figure 2. Study Area


Methods
My group began this assignment by considering the terrain and features at the priory that we could collect multiple attributes for.  We decided to mark the locations we found garbage and signs at the priory.  The next step was to build a geodatabase containing the features and attributes that would be collected.  A new geodatabase was created, as well as "Garbage" and "Signs" feature classes.  The Garbage feature class contained garbage material, garbage size, garbage type, and notes fields, and the Signs feature class had sign color, sign material, sign type, and notes.  To aid in the data collection process, domains were created to allow us to simply select a predetermined option rather than having to type in each attribute.  Once the feature classes were created and the domains were set, their symbology was changed so that they could be differentiated on the Juno when we were out in the field.  The features and an aerial image were added to a blank ArcMap document, and then saved to the Juno using the ArcPad Data Manager toolbar.
           
Once the was saved on the Juno, we were able to go out in the field and begin to collect data using ArcPad.  My group began in the parking lot marking the locations of signs and garbage as it was found.  We then moved to the north and followed a trail where trail marker signs were mapped.  Figure 3 shows the route the we took, as well as the locations of all signs and garbage.
Figure 3. Locations of Signs and Garbage at the Priory

After the data collection, the data was extracted from the Juno by simply copying and pasting the folder back into the Priory folder that I had previously created on the computer.  I examined the data, and then created a series of maps to symbolize the different attributes that we collected. 

Discussion
Having already created the domains for each feature, the data collection was seamless and went very well.  We were able to select from a preset list of options for each attribute which allowed the collection to be very quick and efficient.  The only exception was when the garbage or sign had an attribute that was not part of the domain.  When this occurred, the "other" option was selected and the attributed was specified in the notes field.  Figures 4, 5, and 6 display the garbage material, type, and size of items that were found at the priory.  Most of the garbage items found were plastic bottles, aluminum cans, and plastic bags.  These items were all found near the parking lot for the priory, which makes sense because it is the area where people are the most.
Figure 4. Garbage Material
Figure 5. Garbage Types


Figure 6. Garbage Size
Figures 7, 8, and 9 contain maps symbolizing the attributes collected about signs.  There were many informational signs surrounding the parking lot about parking information.  At the southern extent of the maps, there are dots representing a stop sign on the left, and the priory sign on the right.  The orange signs marking the trail can be seen to the north of the priory building. 
Figure 7. Sign Type

Figure 8. Sign Color

Figure 9. Sign Material
ConclusionThis assignment proved to be a great introduction to the preparation of gathering data in the field.  A geodatabase was first created, along with the two feature classes that our group decided to map (Signs and Garbage).  Domains were then set to provide us with attribute options in the field.  This was very helpful and speeded up the process because we could quickly select an option, rather than having to type in the word.  After the domains were set, the data was saved onto a Trimble Juno GPS unit.  ArcPad was utilized to collect the garbage and signs data at the priory, and following the field work, the data was dowloaded and a series of maps were created to symbolize the different attributes.

HABL Launch

Introduction
Over the course of the semester, our class has spent a lot of time using balloons to collect aerial imagery of our campus.  In addition to those mapping activities, we also created a rig for what we called the HABL (High Altitude Balloon Launch).  This activity involved launchig a balloon into space while recording video of the flight.  The balloon was to travel about 100,000 feet up until it popped due to the pressure.  The parachute would then open up and bring the camera rig back down to surface.    


Methods
The construction of the HABL rig began a few months ago, with design modifications occurring after some of the other balloon mapping exercises.  Figure 1 shows the container used to house the camera for this activity made out of a styrofoam bait container.  A hole was cut out of the bottom for the camera lense to take video during its flight.  The rig also contained a water proof case for the camera, handwarmers to keep the camera from getting too cold, and a tracking device to that we could recover the rig after it came back down to the surface.  Four strings were connected from the edges of the rig and tied together at the top.

Figure 1. Rig designed to house the video camera for HABL launch
Figure 2 shows the balloon being walked to the balloon launching site in the middle of the campus mall.  The balloon was filled from a large helium tank until it was about eight feet in diameter.  We did not want to fill the balloon up too much because the balloon needs to expand as it gets to higher altitudes.  After the balloon was filled to the desired amount, zip ties and duct tape were used to seal off the balloon.  The rig containing the camera and parachute were then attached using carabiners.  After watching the weather closely for a few weeks, the launch was finally scheduled for 10 AM on April 26. 
Figure 2. Balloon being walked to the launch site
Here is a link to a video that was taken of the launch. 
http://desi.uwec.edu/Geography/Hupyjp/Weather_Balloon_1024.asx
As soon as the balloon was let go, winds immediately took it to the east.  The tracking device stopped working (most likely from cool temperatures), but fortunatly about an hour and a half later we got a stationary signal indicating that the balloon had touched down.  Our professor and a few students set out to retrieve the balloon rig which touched down near Marshfield, WI.  Upon arrival, they found the rig stuck in a tree (Figure 3).  Our professor climbing up the tree and cut one of the limbs off to retrieve the rig.       
Figure 3. HABL rig stuck up in a tree


Discussion
The HABL turned out to be a success, as we were able to collect some great video of its journey.  In the course of an hour and a half, the balloon traveled about 100,000 feet up in the air and about 78 miles to the southeast.  Figure 4 shows the distance traveled by the balloon rig. 

Figure 4. Distance traveled by balloon rig
Figures 5, 6, and 7 show some images extracted from the video footage. 


Figure 5. Still shot from the camera of the campus footbridge

Figure 6. Still shot of the Chippewa River to the east of Eau Claire

Figure 7. Image at the peak of the HABL launch where the curvature of the Earth is visible
Although our main goal of recovering the camera was fulfilled, there were some aspects of this activity that could have been improved.  Condensation covered the lens of the camera at higher altitudes and left some of the footage to be a bit hazy.  As previously mentioned, the tracking device stopped working during the flight but did function properly after it landed.  It would have been cool to watch the flight in real time.  Also, the camera that was used only had a capacity to take video for one hour so the full descent of the balloon was not captured.   

Conclusion
This activity was really a culmination of efforts throughout the entire semester and was based on trial and error.  Balloon mapping is not very widespread, so there was not much information about it, leaving us to work together make this activity work.  I feel very fortunate to have been able to have been a part of something as an undergrauate student that not many people have a chance to participate in.  Overall, I thought the aerial image gathering and HABL using balloons were some of the coolest projects I have been a part of in college.  In the future, this class plans to include a GPS unit, thermometer, barometer, and anemometer to be able to gather more data during the flight.