Introduction
Our geospatial fields methods class will be conducting an exciting balloon mapping project this semester. The project is composed of two different aspects, with the first being a balloon being launched above campus with a camera in continuous shot mode taking aerial images to then be mosaicked together to create a map. The second aspect is a high altitude balloon launch, HABL for short, which consists of a balloon being launched into space with a camera taking a video of its travels. This report will document the preparations and construction of materials for these projects. Some very basic instructions with came with the balloon kit, so other websites were looked at to get a better understanding of the projects.Here is the link to the website that our balloon kit was purchased from: http://publiclaboratory.org/wiki/balloon-mapping-kit
These two sites also had information on launching balloons:
http://archive.publiclaboratory.org/download/Grassroots_Mapping_English_2_0.pdf
http://the-rocketman.com/recovery.html
Methodology
Behind every successful field outing is a lot of preparation and planning. To prepare for our balloon mapping projects, there were many tasks that needed to be accomplished. These included: construction of mapping and HABL rigs, weighing of mapping and HABL rigs, parachute testing, creation of a method for implementing continuous shot on cameras, and testing of tracking device. The class consists of about 20 students, and individuals were able to work on whichever aspect of the planning and construction they were most interested in. This flexibility also allowed people to walk between the different projects that people were working on and get a good sense of what was going on in each phase of the construction.
Mapping Balloon
Two different groups worked on prototypes for the low altitude mapping rig. The basic concept was to hang a camera from string in some sort of a plastic container. The plastic container would have a portion cut out with the camera facing out in that direction. The first prototype utilized a plastic jug with the bottom portion of it cut off. The camera was then hung facing down with string as shown in Figure 2.
 |
| Figure 1. Side view of low altitude mapping rig prototype. |
 |
| Figure 2. Bottom view of low altitude mapping rig prototype. |
 |
| Figure 3. "Hindenberg" prototype. |
Since the HABL will be launched into space, the design is much more complicated. A basic diagram can be seen in Figure 4. Our design will use a styrofoam container generally used for minnows to house the camera and tracking device. Connected to the payload is the parachute, which will deploy when the balloon pops. Due to decreasing pressure in the atmosphere, the balloon will continue to expand until it pops. Finally, the balloon can be seen on top.
 |
| Figure 4. Diagram of HABL rig. |
 |
| Figure 5. Small hole for camera view. |
 |
| Figure 6. Cutting the round insulation piece. |
 |
| Figure 7. Weighing materials for construction. |
 |
| Figure 8. Zip ties. |
 |
| Figure 9. Handwarmers. |
 |
| Figure 10. Carabineer that will be used to connect the rope. |
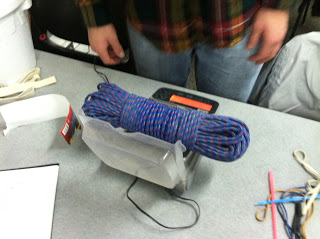 |
| Figure 11. Rope that will be used to connect the payload, parachute, and balloon. |
| Balloon Mapping Weight Chart | |
| Item | Weight |
| Balloon (Orange) | 315.5 g |
| Balloon (Red) | 322.25 g |
| Black rubber ring (~1 inch) | 8.25 g |
| Camera (Biggest, black) | 392.17 g |
| Carabineer (blue with key ring) | 4.79 g |
| Carabineer (silver with loop) | 26.71 g |
| Coke Bottle (2 liters, empty, whole with cap) | 50.86 g |
| Coke Bottle (Top, Label "1") | 18.6 g |
| Coke Bottle (Top, Label "2") | 12.5 g |
| Handwarmers (2 in package) | 54.37 g |
| Jif Peanut Butter (No cap, empty, whole) | 48.6 g |
| Memory card (16 gb) | 2.16 g |
| Memory card (32 gb) | 2 g |
| Minno Thermo with lid and rope | 75.85 g |
| Mt. Dew (2 liters, empty, whole with cap) | 52.08 g |
| Orange Camera (No memory card) | 185.77 g |
| Parachute (blue and orange) | 144.7 g |
| Pink Rope (1 meter) | 1.15 g |
| Rainex Bottle (Empty, whole with cap) | 141.36 g |
| Rope (150 ft.) | 416.51 g |
| Rubber band (black, midrange) | 2.8 g |
| Rubber band (blue, thin, medium) | 2.37 g |
| Rubber band (Extra small, orange) | 1.14 g |
| Rubber band (long, tan, thin) | 4.7 g |
| Rubber band (long, white, wide) | 14.4 g |
| Rubber band (short, white, wide) | 5.69 g |
| Rubber band (thin, white) | 3.5 g |
| Silver Camera (No memory card) | 187.5 g |
| Styrofoam (Pink, 1.5 by 19 by 17.5 in) | 200.3 g |
| Yellow Cord with buckle | 106.5 g |
| Zip Tie (Black) | 1.5 g |
| Zip Tie (long, multicolored) | 1.16 g |
| Zip Tie (Short, multicolored) | .31 g |
| 7 Packs of Handwarmers | 379.86 g |
| Cut Styrofoam+Minno Thermo | 102.12 g |
| Green Bottle (With cannon, grey "Hindenburg") | 239.69 g |
| Total Pay Load for High Altitude | 944.34 g = Approx. 2.08 lbs |
 |
| Figure 12. Parachute testing rig. |
Continuous Shot Method for Cameras
It was determined that the HABL would have the camera in video mode, while the low altitude balloon's camera would be in continuous shot mode for better quality images that would be used in the mapping process. A test was performed to see which method used up more storage space. A video was taken for 20 seconds, and then continuous shot mode was used for 20 seconds, with the camera taking a picture every second. When comparing the file spaces, it was found that the continuous shot mode used up a considerable more amount of file storage. In order for a camera to be in continuous shot mode, the button for taking a picture must be held down. To accomplish this during the flight of the balloon, a rubber band will be put around the camera to hold the button down (Figures 9, 10).
 |
| Figure 13. Orange rubber band wrapped around camera to hold the button down. |
 |
| Figure 14. View of how the camera will be hung in the low altitude balloon rig. |
A tracking device is necessary in these rigs because winds could blow them many miles. Our class obtained a small GPS tracking device that can be tracked using an iPad. The device was tested by some classmates taking a walk outside with it around campus, while others watched their path on the iPad.
Discussion
This project provided our class with a lot of issues that we needed to discuss and solve. We were not given a specific set of instructions, so we had to consult resources and use our creativity to construct the two different balloon rigs. This also led to a lot of collaboration between the whole class. People had to communicate what part of this planning, testing, and construction process they were going to be involved in, as well as ideas they might have had. This planning day should help us immensely when it comes to actually launching our balloons. Only a few last minute tweeks to the designs should have to be made. It also gives us confidence that all of our equipment works properly. Hopefully, all of this preparation will make the launching of the balloons a success. I believe that both aspects of this balloon project will prove to be very exciting and interesting. This is a great opportunity to be involved in a cool scientific project that hopefully produces good results.
Conclusion
As you can see, our class did a lot of work in preparation for the balloon mapping projects that we will be participating in. In this preparation, we constructed two prototypes for the low altitude balloon mapping project, constructed the HABL, weighed all of the construction materials to ensure the balloon would be able to support the weight, tested the parachute, and developed a method for keeping the camera in continuous shot mode. The balloons will be launched towards the end of the semester when the weather is nicer. The results of this project will be uploaded then.
No comments:
Post a Comment